Welcome to Crazed Creations by Crystal Tutorials!
I have been hunting down all of my tutorials for a few years now,
and finally I was able to locate them just the other day.
Some things to know about these tutorials... 
Most of them are missing links to supplies, whether it is 
because an artist or designer has retired, tagger's blog has 
been deleted etc. In this case, please treat the tutorial
as inspiration. As I update each tutorial, I will slowly re-release them.
ALL Tutorials before 2024 are AI FREE, meaning no AI was used.
and all newer tutorials will be labelled accordingly.

Any and all Tutorials posted within this site
are of my own creation.
Any similarities to any other is purely coincidental.
 DO NOT CLAIM AS YOUR OWN!
You are allowed to use them as challenges within your forum 
by linking back to this site.
I hope you enjoy the tutorials that I have created.
Please feel free to leave comments and or suggestions!!!
Some tips...
I use abbreviations in my tutorials, 
the more common ones are below:
C&P~Copy and Paste
RS~Re-size
DS~Drop Shadow
MW~Magic Wand
Showing posts with label Artist: Keith Garvey. Show all posts

Diva-Tude


This tutorial was written by Chasunicorn
On August 1, 2012.
*Updated November 2025*
Supplies:
Tube by Keith Garvey
Have not seen him since CDO
Kit by Abstract Creations HERE
Template 427 by Missy HERE
Mask of your choice
Drop Shadow:
Whatever you prefer
Canvas Size:
Re-Size copy of the Template
to 750x750
Template:
*Raster1...Select All...Paste into selection paper 3
Apply a mask of your choice
*Merge Small Circle, Dots, and Heart layers
Adjust Color of these layers with Manual Color Correction to match your
Kit
*Circle 1 Back...Adjust/Add Noise 100%
*Circle 1...Adjust color with Manual Color Correction to match your
Kit
Select All/Float/Defloat...Add a Close Up as a new layer
Invert/Delete...Opacity 64%
*Frame Back...MW...Paste into Selection paper 4...add your close up
Mirror...Invert/Delete...Opacity 64%
*Frame...Flood fill with a color to match your kit/tube
Adjust/Add Noise 100%
*P Back...Adjust/Add Noise 100%
*P...Adjust color with Manual Color Correction to match your
Kit
*WA Back...Adjust/Add Noise 100%
Add your preferred Tube where you think it looks best
C&P Elements:
*Element 69...Paste behind Wordart
*Element 20...RS 85%...place on top of Circle 2
*Element 50...RS 85%...Place in the left top corner...Duplicate
Mirror and Merge...Opacity 70%
*Element 68...Paste above the rose petals
*Element 64...Paster behind your Main Tube
*Element 85...Paste on top of your tube...Opacity 70%
*Element 61...Paste by the P...Mirror...RS 75% x2
Add your name, Copyright info and Watermark
Re-Size your tag if you want to and you are done
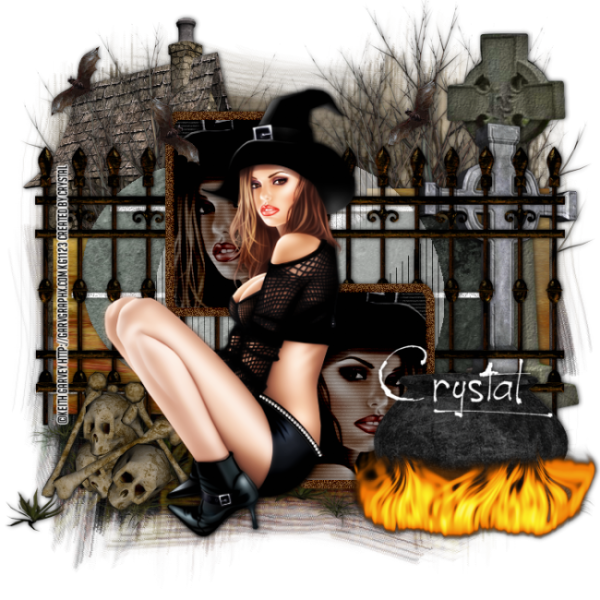
Perfect Scare


 This tutorial was written by Chasunicorn

On September 19, 2012.

*Updated November 2025*

Supplies:

Tube by Keith Garvey

but I have not seen him selling anywhere recently

Scrap Kit by HorsePlay's Pasture Designs HERE

Template by Crazed Creations by Crystal HERE

Mask of Choice

Filters:

DSB Flux-Bright Noise

Photo Effect- Scanlines

Tramages- Tow the Line

Drop Shadow:

Whatever you prefer

Template:

*Open Template and Duplicate Close the Original.

*Raster 1...MW...C&P paper 2 into selection and

apply a Mack of your choice.

*Raster 2...Apply DSB Flux/ Bright noise Default Settings

*Raster 3 & Copy Of Raster 3...Merge Down Layers

MW...C&P paper 9 into selection

*Raster 4 &Copy of Vector...MW...C&P paper 7 into selection

*Raster 5...Add DSB Bright Noise...Any Settings is fine.

*Raster 6 & Copy of Raster 6...Merge Down...Select/Float/Defloat

Apply a color from the tube or kit and add Bright Noise.

*Raster 7 & Copy of Raster 7...Merge Down...MW...

add your close up to the Rectangles...Merge Close Up layers

Duplicate...On original Close up Blend mode Luminance (L)

On the cope apply a Gaussian Blur 2% and Blend mode Burn.

Opacity on all Close Up layers set to 65%

On the Black Rectangle Apply Photo Effect- Scanlines

settings 2/2/20/36/65/0

*Raster 8...Apply Tramages- Tow the Line settings 80/54/48/9

Opacity 50%...slide under Raster 6

Add your preferred Tube where you think it looks best

C&P Elements:

*Element 13...Place on top Raster 2...Duplicate and mirror

*Element 34...Place on top of Raster 8...Duplicate and Mirror

*Element 42...Place above the mask...Slide towards the bottom

of the canvas.

*Element 14 and 15...RS 85% on both 2 times and arrange to your liking

(See my Tag for reference)

*Element 33...RS 65%...Place behind the trees to the left of the tag

*Element 8...RS 65%...Place to the Right of the canvas

(See my Tag for reference)

*Element 7...RS 65%...Place to the left of the Canvas

(See my Tag for reference)

*Element 29...RS 65% 2 times...Duplicate a few times

place randomly around your tag

Add your name, Copyright info and Watermark

Re-Size your tag if you want to and you are done
Buckle Bunny Forum Set


This tutorial was written by Chasunicorn
on July 3, 2012.
*Updated November 2025*
Supplies:
Tube by Keith Garvey
but I have not seen him selling anywhere recently
Kit by Dreamsfulfilled
(This kit is unavailable but any Cowgirl/
Country Western kit should work)
Filters:
MuRa's Meister~Copies
Drop Shadow:
-3/-5/40/BLACK
3/5/40/BLACK
Canvas Size:
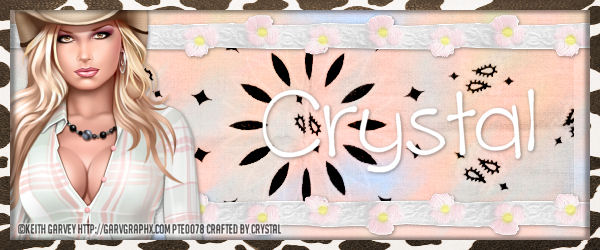
AV 150x150 Banner 600x250
Banner:
*Raster 1...MW...paste into selection paper 6
Select/Modify/Contract/26...paste paper 4
as a new layer...RS 55%x2 Invert and Delete
Blend Mode Burn
*New Raster...MW...Paste into selection paper 2
Select/Modify/Contract/10/Delete
Add DS -3/-5/40/BLACK and DS Again 3/5/40/BLACK
*Element 13 (pack #1)...RS 55%x2...slide under the frame
Duplicate and Flip...Merge Down
Add your tube...MuRa's Meister/Copies/Wallpaper...
Adjust/Blur/Motion...Angle 50%/Strength 100%...Blend Mode
Color Legacy
*Add the close up of your tube and move to the left
Avatar:
*Close out top 2 layers...Copy Merge and paste on
the AV Canvas...RS 75% again at 85%
*Click on Raster 1 and Select all...Image/Crop to selection
Select all...paste paper 2...Select/Modify/Contract/7
Add DS -3/-5/40/BLACK and DS Again 3/5/40/BLACK
Add your tube
Add your name, Copyright info and Watermark
Re-Size your tag if you want to and you are done
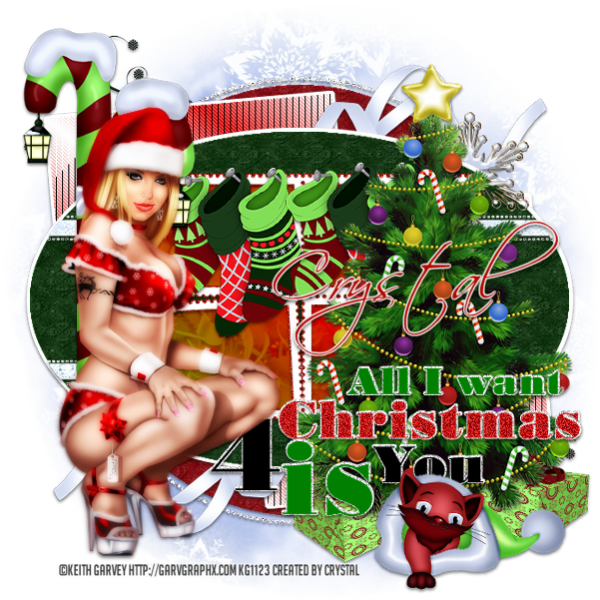


All I Want


 This tutorial was written by Chasunicorn
on November 12, 2012.
*Updated November 2025*
Supplies:
Scrap Kit by Crystal and Amy Collab
This kit is unavailable but any Christmas kit should work
Tube by Keith Garvey
but I have not seen him selling anywhere recently
Template #5 by Kandi and Dee
Circle Mask by Monti's Playground
Filters:
Tramages- Tow the Line
Xero- Porcelain
MuRa Meister-Copies
Drop Shadow:
Whatever you prefer
Template:
Open Template...Duplicate and Close the original
Delete Credit and Red Dots Layers
*BG...MW...C&P paper 9 (Amy's part) into selection
Apply Mask...Merge Group
*Red Circle...MW...C&P paper 4 (Amy's part) into selection
*Dotted Circle...Select All/Float/De-float...Flood Fill
with White...Add Noise
*Gradient Layers...Apply Tramages- Tow The Line with default Settings
*Green Oval......MW...C&P paper 1 (Amy's part) into selection
*Dotted Lines...Select All/Float/De-float...Add Noise
*Red Strips...Merge top and bottom layers...MW...C&P Paper 3 (Amy's Part)
as a new layer...Select/Modify/Expand/1...Invert/Delete...Merge Layers Down
*Stamps Green...MW...Flood Fill with Red...Add Noise
*WordArt Back...Add Noise
C&P Elements:
*Tube...Select Stamp Green Layer....MW...Select/Modify/Expand/4
Paste Tube...Apply MuRa Meister- Copies Wallpaper (Lighten) Default Settings
Blend Mode Soft Light
*Element 4 (Amy's Part)...Position in the top left Corner...Duplicate/Flip/Mirror
Merge Layers...Move down on top of the Red Circle layer
*Element 31 (Amy's Part)...RS 75%...Paste to the Right of the canvas
*Element 29 (Amy's Part)...RS 75%...Duplicate and line the stockings along the Stamp Frame
Merge layers and place behind the tree
*Element 28 (Amy's Part)...RS 55%...Place under the tree...Duplicate and Mirror
Arrange
*Element 26 (Amy's Part)...RS 55%...Place beneath the tree by the presents
*Element 17 (Amy's Part)...Place to the left
*Ribbon 4 (Amy's Part)...Place above the Gradient Layers to the Right
Duplicate/Flip/Mirror...Merge Layers
*Add your preferred Tube where you think it looks best
Apply Xero- Porcelian with the settings 50/128/128/0/0/0
Add your name, Copyright info and Watermark
Re-Size your tag if you want to and you are done
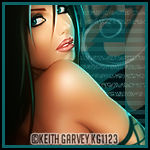
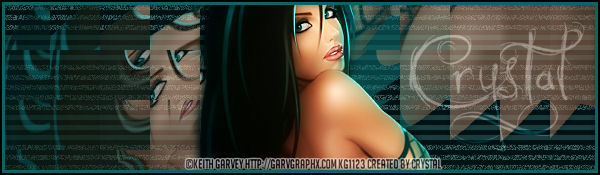
Teal Seduction Forum Set


This tutorial was by written by Chasunicorn

on February 19, 2013.

*Updated November 2025*

Supplies:

Tube by Keith Garvey

I have not seen him selling anywhere recently 

Filters:

VM Extravaganza~ Transmission

DSB Flux~ Mosaic Ripple

DSB Flux~ Bright Noise

Drop Shadow:

Whatever you prefer

Canvas Size:

Banner: 600x175

AV: 150x150 (Optional)

Step by Step:

**Open a New Canvas 600x175

Flood fill Black

*Create a new layer and flood fill with #0c6467

Apply VM Extravaganza~ Transmission...Settings 12/12/54

Opacity 40%

*Create a layer...Use your selection tool set to Eclipse

Draw out an Oval shape in the lower left corner of your canvas

(it will be cut of and that is OK cause it is what we are looking for.)

Flood Fill #0c6467...Duplicate/Mirror/Flip...apply your close up

as you prefer to the left shape...On the other shape apply a different

part of your tube...Merge each tube layer to the coordinating shape.

Apply DSB Flux~ Mosaic Ripple Default Settings

**On the 2nd layer...add some noise to some of the areas (Optional)

**Add your Main focal tube where you like it.

**Add a simple border.

Add your name, Copyright info and Watermark

Re-Size your tag if you want to and you are done.


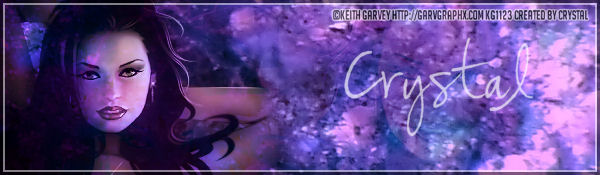
Purple Light Fantasy Forum set


This tutorial was written by Chasunicorn
on February 16, 2013.
*Updated November 2025*
Supplies:
Underwater Lights Texture HERE
Tube by Keith Garvey
but I have not seen him selling anywhere recently
Filters:
MuRa Meisters~ Copies
AAA Frames~ Foto Frame
Drop Shadow:
Whatever you prefer
Canvas Size:
Banner: 600x200
Step by Step:
**Raster 1...Flood Fill with a color from your texture/tube
I am using #8e6a94
**C&P your close up...RS if needed...Apply MuRa Meister~ Copies
Wallpaper settings Default...Opacity 30%...Blend Mode Soft Light
**C&P Texture of Choice...I am using Under3
Arrange to your liking...Blend Mode Overlay
**Add your Tube to one side...Smudge the edges a lil bit to
blend it in to the background...Duplicate...
On the original Blend Mode Luminance (L) Opacity 80%
On the Copy add a blur 10% Blend Mode Overlay Opacity 80%
**Merge Visible and apply AAA Frame~ Foto Frame
Chose your preferred Settings.
***Create an Avatar if you like
Add your name, Copyright info and Watermark
Re-Size your tag if you want to and you are done.
 

Thanks to Give Forum Set


This tutorial was written by Chasunicorn

on November 15, 2012

*Updated November 2025*

Supplies:

Tube of Choice

I am using a tube by Keith Garvey

but I have not seen him selling anywhere recently

Mask #5 by Spawn

Texture #28 by Millie HERE

Filters:

VM Extravaganza- Transmission

MuRa's Meister- Copies

Drop Shadow:

Whatever you prefer

Canvas Size:

Tag: 600x250 AV:150x150

Banner:

*Raster 1...Flood Fill with a color of choice from your

tube...Apply VM Extravaganza- Transmission...Settings 6/0/40

*Tube...C&P tube close up as a new layer...Apply MuRa's Meister- Copies

Settings Wallpaper with Default....Adjust/Blur/Twirl...

Settings 100/-20/Elliptical 3/10/30 two times...Blend Mode Soft Light

*Raster 3...Add a new layer...Select All...C&P texture into selection

Opacity 80% Blend Mode Luminance (L)

*Raster 4...Add a new layer...Create a custom selection with these settings

Top: 114 Bottom: 134 Left: 0 Right: 337...Flood Fill with another color

from you tube...Duplicate and arrange them to your liking...Blend Mode Overlay

*Add your preferred Tube where you think it looks best

Duplicate Add a slight blur Blend Mode Overlay

*Raster 6...Add a new layer...Flood fill white...Select all/Contract/6/Delete

*Raster 7...Add a new layer...Flood Fill with the 2nd color from your tube

Select all/Contract/3/Delete...Add noise

*Add elements or word art if you like (Optional)

Avatar:

Close all layers except the bars, and texture layers

Copy Merged onto a new canvas RS 85%

Position where you like it

Select all Raster 1...Image/Crop to Selection

Add your tube if you like and add the same border as your tag.

Add your name, Copyright info and Watermark

Re-Size your tag if you want to and you are done