Welcome to Crazed Creations by Crystal Tutorials!
I have been hunting down all of my tutorials for a few years now,
and finally I was able to locate them just the other day.
Some things to know about these tutorials... 
Most of them are missing links to supplies, whether it is 
because an artist or designer has retired, tagger's blog has 
been deleted etc. In this case, please treat the tutorial
as inspiration. As I update each tutorial, I will slowly re-release them.
ALL Tutorials before 2024 are AI FREE, meaning no AI was used.
and all newer tutorials will be labelled accordingly.

Any and all Tutorials posted within this site
are of my own creation.
Any similarities to any other is purely coincidental.
 DO NOT CLAIM AS YOUR OWN!
You are allowed to use them as challenges within your forum 
by linking back to this site.
I hope you enjoy the tutorials that I have created.
Please feel free to leave comments and or suggestions!!!
Some tips...
I use abbreviations in my tutorials, 
the more common ones are below:
C&P~Copy and Paste
RS~Re-size
DS~Drop Shadow
MW~Magic Wand
Showing posts with label No Scraps. Show all posts

Serene


 This tutorial was written by Chasunicorn

On September 13, 2012

Supplies:

Tube by Dark Yarrow HERE

Flower Overlays by Sarah (Now FTU) HERE

Filters:

None

Drop Shadow:

Whatever you prefer

Step by Step:

First off lets chose the colors that we will be working with...

I am going to use #787486 (Foreground) and #452e60 (Background)

Raster 1...Apply Background color.

I am going to be using...Stones Water Overlay...C&P as a new layer

RS by 60%...Duplicate the overlay...move Original layer to the Right of

the canvas...Add a Motion Blur with these settings Angle: 50% and Strength: 80%

Duplicate this blurred Layer and Mirror...Merge Down and Blend Mode to Overlay.

On the other copy of the Stones Water Overlay...we are going to use the Eraser Tool

but with a Fuzz Soft Brush Tip (I believe this is a Standard tip that came with my PSP9)

Slide this Overlay layer to the left or right whatever fits your taste...

I am sliding it to the left and going to erase the edge in a round curve.

Blend Mode Multiply

(See my tag for reference)

Add a New Layer...Fill with your Foreground color change Blend mode to Luminance(L)

Slide this layer under the Overlay you used the Eraser on.

Add your preferred Tube where you think it looks best

Change Blend Mode to Luminance(L) and Opacity to 55%

Add a new layer...now I change my palette to a Fore/Back Gradient with

these settings Linear Angle: 147 Repeats: 7...Fill with Gradient

Select all/ Modify/Contract 6/ Delete

For the border DS I used 0/0/75/12/BLACK

Add your name, Copyright info and Watermark

Re-Size your tag if you want to and you are done


Some results from this tutorial:


Autumn Musings


This tutorial was written 
on November 14, 2025.

Supplies:
Paintshop Pro
 Any version should work 
Image or Paper from a kit
I chose a paper from a retired designer
with loads of orange in it
Tube of Choice 
I am using a tube by Rebecca Sinz 
you can find it HERE

Font Used:
Carmilla HERE

Filters/Effects:
Mosaic ~Glass 
Blur ~Radial

Canvas Size: 
700x275

Step by Step:
*Selections ~ Select All
C&P your paper or Image of choice.
Using these settings Twirl/Strength 100%/Twirl degrees 0/Elliptical checked/Horizontal 10/
Vertical 10/Protect Center 0
*C&P your tube… Center your tube on your design
Objects ~ Align ~Horizontal Center
Duplicate tube and Image ~ Flip ~ Vertical the slide to 
either side…Duplicate and Image ~ Mirror Horizontal and Merge Down
*Staying with this layer apply Effects ~ Texture ~ Mosaic Glass with these settings
25/25/12/0/10/100  
Blend Mode: Burn...Opacity: 40
*Middle Tube…Duplicate.. DS bottom tube layer
Top layer Blend: Hard Light Adjust ~ Sharpen
*I added a simple tagline in the font Carmilla
Add your name and the tube's copyrights


Free Style


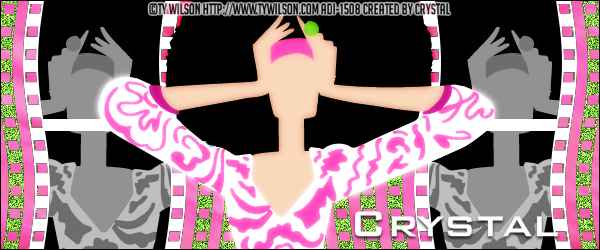
This Tutorial was written by Chasunicorn
on May 3, 2015.
*Updated November 2025*
Supplies:
Tube by Ty Wilson
He has not sold anywhere since ADI
Template 145 by Spawn
Filters:
MuRa's Meister: Copy
Drop Shadow:
Whatever you prefer
Template:
**Open template and Duplicate
Close original and delete Credit layer
**Close out all layers except the background layer
(I tend to work from the bottom to the top)
*Main Background layer...Flood Fill with #f361a8
C&P as a new layer your tube...Apply MuRa's Meister: Copy
Using the Wallpaper Setting...Adjust/Blur/Motion...Blend Mode: Overlay
Opacity: 50%...Arrange the blended tube layer to you liking
*Film Lines layer...Flood Fill with #7fc143 and add some noise
*Right & Left Film layer...Flood Fill with Black...MW and C&P your tube as a new layer
Invert/Delete...Duplicate/Mirror and Adjust the tube 
to be on top of the Left Film layer... Blend Mode: Luminance L...Opacity: 75%
*Right & Left Film Background layer...Flood Fill with White
*Border layer...Flood Fill with Black
Add your preferred Tube where you think it looks best
Add your name, Copyright info and Watermark
Re-Size your tag if you want to and you are done 

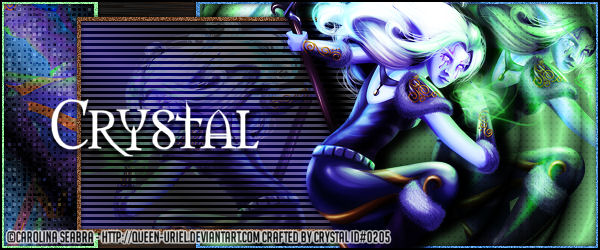
Wrath


on July 4, 2014.
*Updated November 2025*
Supplies:
Tube by Queen Uriel (No Longer Available)
Template #76 by Spawn's Templates
Filters:
VM Experimental: Needles and Pins
Xero: Fritillary
VanDerLee: Unplugged-X~ Radial Wave
VM Extravaganza: Transmission
Drop Shadow:
Whatever you prefer
Template:
**Open template and Duplicate
Close original and delete Credit layer
**Close out all layers except the background layer
(I tend to work from the bottom to the top)
*New Raster...Slide to the very bottom of the template
Flood fill with a Black and Brown (#784d30) Gradient
Apply VM Experimental: Needles and Pins with these settings:
92/32/32/32/255
*BG 1 layer...MW and Flood fill with a Black and Med Blue (#5092d5) Gradient
Apply Xero: Fritillary with these settings 5/30/35/46...C&P your tube as a new layer
Arrange to your liking...Blend Mode: Color
*Dots 1 layer...Blend Mode: Soft Light
Frame 1 layer...Flood Fill with Lt Green (#91eb98)
Apply a small bit of noise
*BG 3 layer...MW and Flood fill with a Black and Lt Green (#91eb98) Gradient
Apply VanDerLee: Unplugged-X~ Radial Wave with Default Settings
*Dots 3 layer...Blend Mode: Soft Light
Tube layer...C&P your tube as a new layer
Arrange to your liking...Duplicate/Mirror...Blend Mode: Overlay 
*Frame 3 layer...Flood Fill with Med Blue (#5092d5)
Apply a small bit of noise
*BG 2 layer...MW and Flood fill with a Black and Violet (#392c74) Gradient
Apply VM Extravaganza: Transmission with Default Settings
Tube layer...C&P your tube as a new layer
Arrange to your liking...Blend Mode: Soft Light
Dots 2 layer...Delete this layer
*Frame 2...Flood Fill with Brown (#784d30)
Apply a small bit of noise
Add your name, Copyright info and Watermark
Re-Size your tag if you want to and you are done
 This Tutorial was written by Chasunicorn

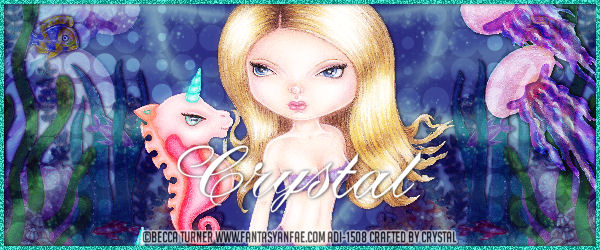
Under Sea Life


 This Tutorial was written by Chasunicorn

on March 15, 2014.

*Updated November 2025*

Supplies:

Tube by Becca Turner

have not seen her since ADI

Forum Sized Mask #4 and #5 by Spawn

Filters:

NONE

Drop Shadow:

Whatever you prefer

Canvas Size: 

600x250

C&P Elements: 

*Raster 1...MW and Flood Fill with #498d98...C&P as a new layer

Mask #5...We will using the masks as overlays...Change the Blend mode

to Overlay...Opacity to 30%

*Seascape portion of the tube...C&P as a new layer...RS by 45% and 

again by 55%...Place to the either side of canvas...Duplicate/Mirror...

Merge Down and change the Blend mode to Multiply

*Raster 4...Add a New layer...MW and Flood Fill with #b46dc9...C&P as a 

new layer Mask #5...We will using the masks as overlays...Change the Blend mode

to Overlay...Merge Down and Change the Blend Mode to Soft Light

*Jellyfish portion of the tube...C&P as a new layer...RS by 55% 2xs...

Duplicate...Place one copy on the top to the right and place 

the other to the left behind the seascape...Blend mode on the back copy to Soft Light

Blend mode on the front copy to Hard Light

*Tube...C&P as a new layer...RS by 45% 2xs...Place in the center

*Border...New Raster...Flood Fill with #22b9a8...Select All/Float/Defloat/

Contract by 4...Apply some Noise

Add your name, Copyright info and Watermark

Re-Size your tag if you want to and you are done

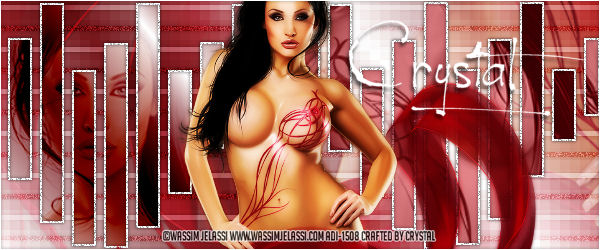
Red Satin


This Tutorial was written by Chasunicorn

on March 26, 2014.

*Updated November 2025*

Supplies:

Tube by Wassim Jelassi

He has not been seen since ADI

Template #116 by Spawn

Filters:

Neology~Blend Mosiac

Drop Shadow:

Whatever you prefer

Template:

**Open template and Duplicate

Close original and delete Credit layer

**Close out all layers except the background layer

(I tend to work from the bottom to the top)

*Main Background layer...MW and Flood Fill with a 

foreground/background gradient using White and #751419 (Dark Red)...

Using these settings: Linear/Angle 50/repeats 2 with invert checked...

Apply Neology~Blend Mosiac with a setting of 10...

*Tube...C&P as a new layer...Arrange to the right of the canvas...and line up the 

bottom of the tube with the bottom of the canvas...RS if you like...

Select All then Image/Crop to selection...Opacity 70% and Blend Mode is set to Overlay

*Horizontal Lines layer...MW every other line and flood fill with white...Deselect and MW 

the other lines and flood fill with red...Apply some noise to the red lines...

Blend Mode: Soft Light

*Rectangles Background layer...MW the first 9 shapes...Flood Fill with 

the gradient you used on the Main BG...C&P as a new layer your tube again and arrange 

with the face within as much of the shapes as possible...Invert/Delete...Tube Blend mode: Burn

Opacity: 60...Repeat this step again except using one of the solid colors and Blend Mode: Luminance (L)

Opacity: 70

*Rectangles Border Layer...Select All/Float/Defloat...Flood Fill with White

Apply some Noise

*Border layer...Apply Some Noise

Add your preferred Tube where you think it looks best

Add your name, Copyright info and Watermark

Re-Size your tag if you want to and you are done 

Garden Buddy


This Tutorial was written by Chasunicorn
on April 24, 2014.
*Updated November 2025*
Supplies:
Tube by Norma Burnell
Have not seen her selling since ADI
Template 59 by Spawn's Templates
Filters:
Pente.com~ Dot and Cross
Drop Shadow:
Whatever you prefer
Template:
**Open template and Duplicate
Close original and delete Credit layer
**Close out all layers except the background layer
(I tend to work from the bottom to the top)
*Main Background...Choice 2 colors from your tube
I am using #b1cb65 and #88d5f1...Switch to Gradient Option
and use the Foreground/Background setting...Flood Fill this layer with the 
new Gradient that you just created.
*Black Angled Lines...Choose another color from your tube
I am using #df8854...MW and Flood Fill with new color
Apply a little noise to this layer...Blend Mode to Soft Light
*Grey Angled Lines...Choose another color from your tube
I am using #f0adde...MW and Flood Fill with new color
Apply Pente.com~ Dot and Cross with these settings 72/4/2
...Blend Mode to Soft Light
*Grey Foreground...Choice 2 colors from your tube
I am using #f7e0f0 and #d5ade7...Switch to Gradient Option
and use the Foreground/Background setting...MW and Flood Fill this layer with the 
new Gradient that you just created...Blend Mode to Soft Light
*Tube...C&P as a new layer...Arrange to show what ever part 
of the tube you would like...With the Foreground layer still selected...Invert/Delete
Duplicate and Mirror the tube tube layer copy
Change one of the tube layers Blend mode to Soft Light and the other to Overlay
*Main Tube...C&P as a new layer...RS to your liking and place in the middle
*Border...MW and Food Fill with a color of choice
Apply some Noise
Add your name, Copyright info and Watermark

Re-Size your tag if you want to and you are done 

Belly Dancer

This Tutorial was written by Chasunicorn

on May 10, 2014.

*Updated November 2025*

Supplies:

Tube by Alan Gutierrez 

Have not seen him selling anywhere since ADI

Frame Style Mask of Choice

Filters:

Eye Candy 5: Impact ~Bevel

Tramages: Mo'Jellyfish

Penta.com: Jeans

Xero: Fritillary

Drop Shadow:

Whatever you prefer

Canvas Size: 

700x700

Step by Step:

*Flood fill with a color of choice, i am using #76691d

Apply a mask of choice...Merge Group and Apply Xero: Fritillary

using these settings 5/30/35/21...RS Mask if needed

*Choose 2 colors from the tube you are using

I chose...#76691d and #ae6848 then create a gradient by 

using the Foreground/Background settings

Flood Fill Raster one with this gradient and Apply your Frame style Mask

Merge group.

*Select All/Float/De-Float the mask layer

Apply Eye Candy 5: Impact ~Bevel with these settings

Basic~Bevel Width:27.31

Bevel Height: 27

Lighting~ Shadow Color:#76691d

*Using your Selection Tool set to rectangle 

Select the inside area of the frame....Modify/Expand by 1

Add a new Raster and Flood fill with a color of choice

Apply Penta.com: Jeans with these settings 94/2/6

*Add Another new Raster and flood fill with a different color

On this second layer Apply Tramages: Mo'Jellyfish

With These Settings: 30/173/29...Blend Mode: Overlay

Opacity: 50

*C&P your tube as a new layer...Arrange within the selected area

where you like it...Invert/Delete...Opacity: 55

*C&P your tube again as a new layer...RS by 55% and again by 65%

Mirror and place to the left of the canvas

Add your name, Copyright info and Watermark

Re-Size your tag if you want to and you are done