Welcome to Crazed Creations by Crystal Tutorials!
I have been hunting down all of my tutorials for a few years now,
and finally I was able to locate them just the other day.
Some things to know about these tutorials... 
Most of them are missing links to supplies, whether it is 
because an artist or designer has retired, tagger's blog has 
been deleted etc. In this case, please treat the tutorial
as inspiration. As I update each tutorial, I will slowly re-release them.
ALL Tutorials before 2024 are AI FREE, meaning no AI was used.
and all newer tutorials will be labelled accordingly.

Any and all Tutorials posted within this site
are of my own creation.
Any similarities to any other is purely coincidental.
 DO NOT CLAIM AS YOUR OWN!
You are allowed to use them as challenges within your forum 
by linking back to this site.
I hope you enjoy the tutorials that I have created.
Please feel free to leave comments and or suggestions!!!
Some tips...
I use abbreviations in my tutorials, 
the more common ones are below:
C&P~Copy and Paste
RS~Re-size
DS~Drop Shadow
MW~Magic Wand
Showing posts with label Scraps Only. Show all posts

Caramel Dreams


This tutorial was written on January 22, 2026
I use PSP2023 but any version should work.

Supplies:
Scrap Kit by Simplistic Creationz 
Mask of Choice
Add your DS as you go to your liking

Step by Step:
*Open a 600x600 canvas
*Select All and C&P paper 8 into selection
*Apply mask of Choice and merge group
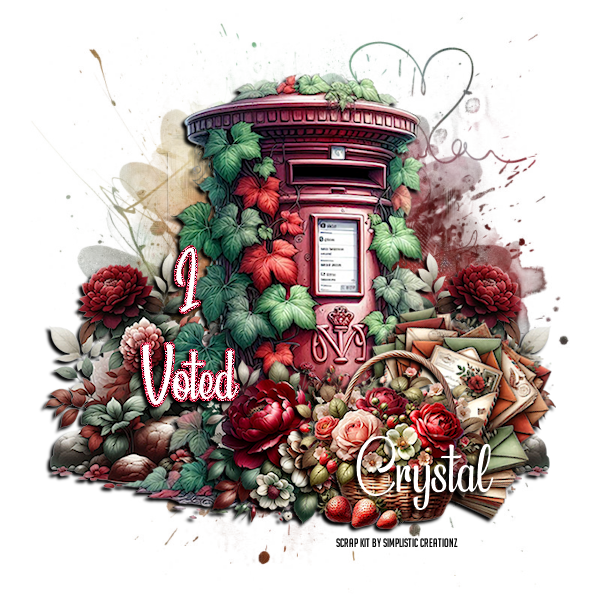
*Element 101, C&P element as a new layer, RS to your liking, Place to the left of the canvas, Duplicate and Mirror Horizontally
*Element 24, C&P element as a new layer, RS to your liking, Place in the center of the canvas
*Element 105, C&P element as a new layer, RS to your liking, Place to the right of the Mailbox, Image/Free Rotate to the right/ 22.5
*Element 52, C&P element as a new layer, RS to your liking, Place to the right of the Mailbox in front of the letters
*Element 75, C&P element as a new layer, RS to your liking, Place to the left behind the basket, Flip Horizontal so the large red peony is seen
*Add some wording… this is going to be a "I Voted" tag for me.
*Add Credits and your name and you have created a quick easy tag
Happy Tagging all!



 

Nerdy Time


 This Tutorial was written by Chasunicorn

on May 9, 2014.

*Updated November 2025*

Supplies:

Nerds Rule Scrap Kit by Abstract Creations

(This kit is no longer available but any kit should work)

Mask of Choice

Filters:

NONE

Drop Shadow:

Whatever you prefer

Canvas Size: 

700x550

C&P Elements: 

*Mask layer...MW and C&P into selection paper 3

Apply your mask of choice and Merge Group

Using your De-Form tool squish the mask a little 

to make it a thinner and smaller rectangle and re align in the center

*Element 30...C&P as a new layer...RS by 65% 2xs...Place to either 

side of the canvas...Duplicate and Mirror...Duplicate again and RS again by 65%

Duplicate the smaller one and Mirror

*Element 28...C&P as a new layer...RS by 45% 2xs

Place in front of the other flowers and Duplicate and Mirror

*Element 43...C&P as a new layer...RS by 25% and 

Place among the flowers...Duplicate and mirror

*Element 41...C&P as a new layer...RS by 25%

Place behind all the flowers towards the middle

Duplicate and stagger the stars

Duplicate both stars again and Mirror them

*Element 20...C&P as a new layer...RS by 75% 2xs

Place in the direct middle of the flower bunches

*Element 1...C&P as a new layer...RS by 55%

Place to the left of the canvas behind the flowers

*Element 17...C&P as a new layer...RS by 55%

Place to the right of the canvas behind the flowers

*Element 19...C&P as a new layer...RS by 55% 2xs 

Place beside the pair of shoes

*Element 22...C&P as a new layer...RS by 55% 2xs 

Place on top of the pair of shoes to the right

*Element 34...C&P as a new layer...RS by 55% 2xs

and again by 75%...Free Rotate by 90 to the left...

Duplicate/Mirror

*Element 33...C&P as a new layer...RS by 45%...Flip...

Using the De Form Tool give the element a slight 

angle to the right...Place behind one of the stars on the right 

of the canvas

*Element 44...C&P as a new layer...RS by 45% and 

Place to the left among the flowers

Add your name, Copyright info and Watermark

Re-Size your tag if you want to and you are done

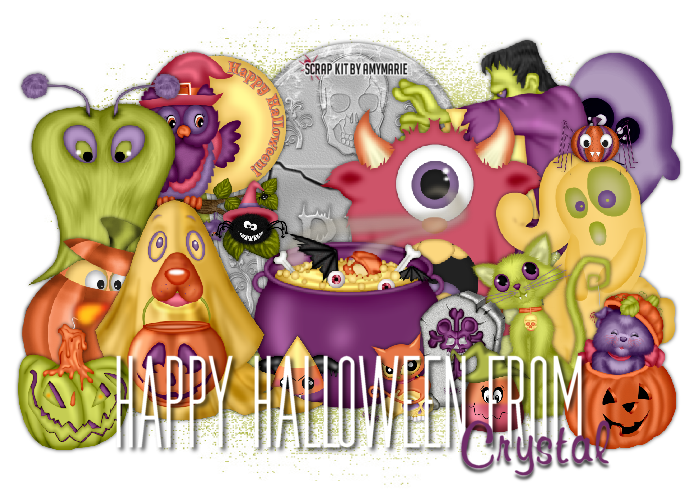
Halloween Time


 This Tutorial was written by Chasunicorn
on September 4, 2014.
*Updated November 2025*
Supplies:
Halloween Scrap Kit by AmyMarie Kits
(This kit is no longer available but any Halloween Kit should work)
Mask of Choice
Filters:
NONE
Drop Shadow:
Whatever you prefer
Canvas Size: 
700x500
C&P Elements: 
*Mask layer...MW and C&P into selection paper 24
Apply Mask of Choice and Merge Group
*Element 33...C&P as a new layer...RS by 75%
Place to the right of the canvas
*Element 2...C&P as a new layer...RS by 55%
Place on the left of the canvas
*Element 7...C&P as a new layer...RS by 55%...
Place behind the dog on the left of the canvas
*Element 27...C&P as a new layer...RS by 55%...
Place in front of the Frankenstein on the right of the canvas
*Element 21...C&P as a new layer...RS by 45%...
Place in front of the Frankenstein on the right of the canvas
*Element 38...C&P as a new layer...RS by 65%...
Place behind the dog on the left of the canvas
*Element 10...C&P as a new layer...RS by 65%...
Place to the center of the canvas
*Element 5...C&P as a new layer...RS by 45%...
Place behind Frankenstein on the right of the canvas
*Element 39...C&P as a new layer...RS by 65%...
Place to the center behind the cauldron slightly
*Element 20...C&P as a new layer...Place to the 
back of all the elements
*Element 42...C&P as a new layer...RS by 45%...
Place in front of the cauldron
*Element 12...C&P as a new layer...RS by 45%...
Place in front of the dog on the left of the canvas
*Element 29...C&P as a new layer...RS by 65%...
Place to the right side of the canvas
*Element 16...C&P as a new layer...RS by 25%
Place where you think it will look best
*Element 8...C&P as a new layer...RS by 25%
Place where you think it will look best
*Element 4...C&P as a new layer...RS by 25%
Place where you think it will look best
*Element 40...C&P as a new layer...RS by 25%
Place where you think it will look best
Add your name, Copyright info and Watermark
Re-Size your tag if you want to and you are done

Holiday Name


This Tutorial was written by Chasunicorn

on December 15, 2013.

*Updated November 2025*

Supplies:

Coming Home For Christmas Scrap Kit by Bits N Bobs

(This Scrap Kit is no longer available but any Christmas kit will work)

Filters:

Eye Candy 5: Impact~ Extrude

Eye Candy 5: Nature~ Snow Drift

Drop Shadow:

Whatever you prefer

Canvas Size:

700x500

C&P Elements:

*Element 42...C&P as a new layer...RS by 55%

Using your De-form Tool give it a slight tilt

to the right

*Element 6...C&P as a new layer...RS by 55% and

Place in the middle of the last element

*Element 44...C&P as a new layer...RS by 65%

Free Rotate to the left by 90...Slide to the left...

Duplicate/Mirror...Merge down and place under the Candle element

*Element 60...C&P as a new layer...RS by 25%...

Slide to the left...Duplicate/Mirror...

Merge down and place under the Candle element

*Element 30...C&P as a new layer...RS by 25%...

Slide to the left...Duplicate/Mirror...

Merge down and place under the Berry element

*Element 31...C&P as a new layer...RS by 55%...

Slide to the left...Duplicate/Mirror...

Merge down and place under the stars & Holly leaf element

*Element 22...C&P as a new layer...RS by 55%...Slide to the

Right...Using you selection Tool set to Rectangle...Draw out a

rectangle on the bottom half of the wreath...Invert/Delete...

Duplicate the left over portion and Mirror it...Merge Down

Duplicate the merged layer...Flip and move down on top of

the original layer...this creates a full effect.

*Using a Bold Font, I am using Impact...Set the Size to 110

Objects/Align/Center...Adjust the font to your liking

BY Stretching the vector your name is in...Apply Eye Candy 5:

Impact~ Extrude using the Centered, Small Tapered

Then Apply Eye Candy 5: Nature~ Snow Drift using the Small,

Rooftop Accumulation...place your name between the wreath layers

Add your Copyright info and Watermark

Re-Size your tag if you want to and you are done

Christmas Chaos

This Tutorial was written by Chasunicorn
on December 20, 2014.
*Updated November 2025*
Supplies:
It's Christmas Time Scrap Kit by AmyMarie Kits
(This kit is no longer available by any Christmas Kit should work)
Mask of Choice
Filters:
NONE
Drop Shadow:
Whatever you prefer
Canvas Size: 
700x700
C&P Elements: 
*Mask Layer...MW and C&P into selection paper 12
Apply Mask of Choice and Merge Group...Using your De-form tool
Squish your mask a little
*Element 54...C&P as a new layer...RS by 85%
Place in the center of the mask just slightly higher
*Element 69...C&P as a new layer...RS by 55%
Place to the left of the canvas...Duplicate 2xs and 
Arrange to the bottom of the tree...Merge Together and Duplicate
Slide to the top of the Mask...Place behin the tree
*Element 19...C&P as a new layer...Place on top of the wreaths
Erase any part of the wreaths that hang past the garland
*Element 14...C&P as a new layer...RS by 55%...Place behind the 
tree to the right side of the canvas...Duplicate...Slide to the right
*Element 120...C&P as a new layer...RS by 45%
Place on top of the wreaths on the left side of the canvas...
Duplicate/Mirror
*Element 121...C&P as a new layer...Place behind 
the garland at the bottom...Duplicate and Flip place 
behind the buildings
*Element 98...C&P as a new layer...RS by 45%
Place where you like it...Duplicate/Mirror
*Element 91...C&P as a new layer...RS by 45% 2xs
Place where you like it, I placed mine on the roof 
of one of the buildings
*Element 83...C&P as a new layer...RS by 45%
Place where you like it
*Element 11...C&P as a new layer...RS by 45%
Place where you like it
*Element 101...C&P as a new layer...Place to the left 
of the canvas...Duplicate/Mirror
*Element 44...C&P as a new layer...Place on top of the tree
Add your preferred Tube where you think it looks best
Add your name, Copyright info and Watermark
Re-Size your tag if you want to and you are done