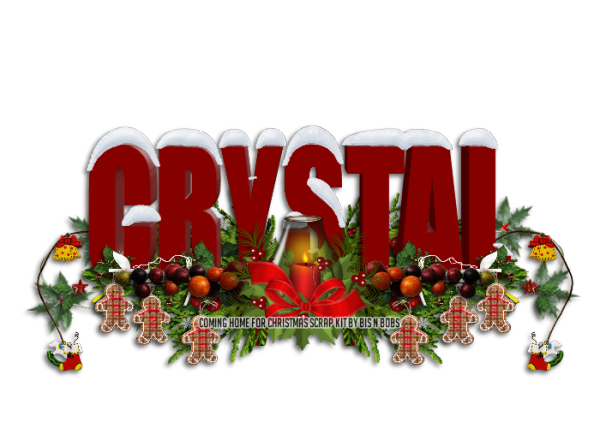
This Tutorial was written by Chasunicorn
on December 15, 2013.
*Updated November 2025*
Supplies:
Coming Home For Christmas Scrap Kit by Bits N Bobs
(This Scrap Kit is no longer available but any Christmas kit will work)
Filters:
Eye Candy 5: Impact~ Extrude
Eye Candy 5: Nature~ Snow Drift
Drop Shadow:
Whatever you prefer
Canvas Size:
700x500
C&P Elements:
*Element 42...C&P as a new layer...RS by 55%
Using your De-form Tool give it a slight tilt
to the right
*Element 6...C&P as a new layer...RS by 55% and
Place in the middle of the last element
*Element 44...C&P as a new layer...RS by 65%
Free Rotate to the left by 90...Slide to the left...
Duplicate/Mirror...Merge down and place under the Candle element
*Element 60...C&P as a new layer...RS by 25%...
Slide to the left...Duplicate/Mirror...
Merge down and place under the Candle element
*Element 30...C&P as a new layer...RS by 25%...
Slide to the left...Duplicate/Mirror...
Merge down and place under the Berry element
*Element 31...C&P as a new layer...RS by 55%...
Slide to the left...Duplicate/Mirror...
Merge down and place under the stars & Holly leaf element
*Element 22...C&P as a new layer...RS by 55%...Slide to the
Right...Using you selection Tool set to Rectangle...Draw out a
rectangle on the bottom half of the wreath...Invert/Delete...
Duplicate the left over portion and Mirror it...Merge Down
Duplicate the merged layer...Flip and move down on top of
the original layer...this creates a full effect.
*Using a Bold Font, I am using Impact...Set the Size to 110
Objects/Align/Center...Adjust the font to your liking
BY Stretching the vector your name is in...Apply Eye Candy 5:
Impact~ Extrude using the Centered, Small Tapered
Then Apply Eye Candy 5: Nature~ Snow Drift using the Small,
Rooftop Accumulation...place your name between the wreath layers
Add your Copyright info and Watermark
Re-Size your tag if you want to and you are done


No comments:
Post a Comment