This Tutorial was written by Chasunicorn
on February 25, 2014.
on February 25, 2014.
*Updated November 2025*
Supplies:
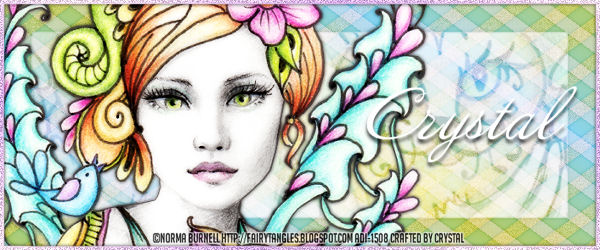
Tube by Norma Burnell
Supplies:
Tube by Norma Burnell
She has not been seen since ADI
Spring Fever by Chichi Designs HERE
Template 499 by Millie HERE
Mask of choice
Filters:
NONE
Drop Shadow:
Whatever you prefer
Template:
**Open template and Duplicate
Close original and delete Credit layer
**Close out all layers except the background layer
(I tend to work from the bottom to the top)
*Background layer...MW and C&P into selection paper 15
Apply Mask and Merge Group
*1 layer...MW and C&P into selection paper 11
RS Layer by 90%
*2 & 3 Layers...Merge these layers together...MW and C&P
into selection paper 13...RS Layer by 90%
*4 layer...MW and C&P into selection paper 3
RS Layer by 90%
*5 & 6 Layers...Merge these layers together...MW and C&P into
selection paper 11...RS Layer by 90%
*7 & 8 Layers...Merge these layers together...MW and C&P
into selection paper 13...RS Layer by 90%
*9 Layer...MW and C&P into selection paper 1
RS Layer by 90%
*10 Layer...Select All/Float/Defloat and flood fill
with a dark green...RS Layer by 90%
*11 & 12 Layers...Delete these layers
*13 Layer...Select All/Float/Defloat and flood fill
with a dark green
C&P Elements:
*Tube...C&P as a new layer...RS by 55% and again by 65%
*Rose...C&P as a new layer...RS by 55% and again by 65%
Duplicate and place a rose to each side of the tube towards
the bottom of the canvas
*Flower String...C&P as a new layer...Using your De-Form Tool
adjust the string to be horizontal...RS by 85% and slide behind the Rose
*Leaves...C&P as a new layer...RS by 45%...Duplicate and Arrange to your
liking behind the rose
*Flower 1...C&P as a new layer...RS by 45% and again by 85%...
Duplicate a couple of times and arrange among the flowers to your liking
Glow Butterflies...C&P as a new layer...RS by 75%...Duplicate and Mirror
Slide above the the 1 layer.
*Glitter Dust...C&P as a new layer...RS by 75%...Place above the 2 layer
Duplicate and Mirror
*Flower Doodle...C&P as a new layer...RS by 85%...Rotate by 90...
Duplicate and Mirror...Place behind the 9 layer
*Rainbow...C&P as a new layer...Place behind the tube
*Branch...C&P as a new layer...RS by 55%...Rotate by 90% to the left
Duplicate and Mirror
*Lace...C&P as a new layer...RS by 55% and again by 75%...Place in front of the
flowers
Add your name, Copyright info and Watermark
Re-Size your tag if you want to and you are done
Spring Fever by Chichi Designs HERE
Template 499 by Millie HERE
Mask of choice
Filters:
NONE
Drop Shadow:
Whatever you prefer
Template:
**Open template and Duplicate
Close original and delete Credit layer
**Close out all layers except the background layer
(I tend to work from the bottom to the top)
*Background layer...MW and C&P into selection paper 15
Apply Mask and Merge Group
*1 layer...MW and C&P into selection paper 11
RS Layer by 90%
*2 & 3 Layers...Merge these layers together...MW and C&P
into selection paper 13...RS Layer by 90%
*4 layer...MW and C&P into selection paper 3
RS Layer by 90%
*5 & 6 Layers...Merge these layers together...MW and C&P into
selection paper 11...RS Layer by 90%
*7 & 8 Layers...Merge these layers together...MW and C&P
into selection paper 13...RS Layer by 90%
*9 Layer...MW and C&P into selection paper 1
RS Layer by 90%
*10 Layer...Select All/Float/Defloat and flood fill
with a dark green...RS Layer by 90%
*11 & 12 Layers...Delete these layers
*13 Layer...Select All/Float/Defloat and flood fill
with a dark green
C&P Elements:
*Tube...C&P as a new layer...RS by 55% and again by 65%
*Rose...C&P as a new layer...RS by 55% and again by 65%
Duplicate and place a rose to each side of the tube towards
the bottom of the canvas
*Flower String...C&P as a new layer...Using your De-Form Tool
adjust the string to be horizontal...RS by 85% and slide behind the Rose
*Leaves...C&P as a new layer...RS by 45%...Duplicate and Arrange to your
liking behind the rose
*Flower 1...C&P as a new layer...RS by 45% and again by 85%...
Duplicate a couple of times and arrange among the flowers to your liking
Glow Butterflies...C&P as a new layer...RS by 75%...Duplicate and Mirror
Slide above the the 1 layer.
*Glitter Dust...C&P as a new layer...RS by 75%...Place above the 2 layer
Duplicate and Mirror
*Flower Doodle...C&P as a new layer...RS by 85%...Rotate by 90...
Duplicate and Mirror...Place behind the 9 layer
*Rainbow...C&P as a new layer...Place behind the tube
*Branch...C&P as a new layer...RS by 55%...Rotate by 90% to the left
Duplicate and Mirror
*Lace...C&P as a new layer...RS by 55% and again by 75%...Place in front of the
flowers
Add your name, Copyright info and Watermark
Re-Size your tag if you want to and you are done