Welcome to Crazed Creations by Crystal Tutorials!
I have been hunting down all of my tutorials for a few years now,
and finally I was able to locate them just the other day.
Some things to know about these tutorials... 
Most of them are missing links to supplies, whether it is 
because an artist or designer has retired, tagger's blog has 
been deleted etc. In this case, please treat the tutorial
as inspiration. As I update each tutorial, I will slowly re-release them.
ALL Tutorials before 2024 are AI FREE, meaning no AI was used.
and all newer tutorials will be labelled accordingly.

Any and all Tutorials posted within this site
are of my own creation.
Any similarities to any other is purely coincidental.
 DO NOT CLAIM AS YOUR OWN!
You are allowed to use them as challenges within your forum 
by linking back to this site.
I hope you enjoy the tutorials that I have created.
Please feel free to leave comments and or suggestions!!!
Some tips...
I use abbreviations in my tutorials, 
the more common ones are below:
C&P~Copy and Paste
RS~Re-size
DS~Drop Shadow
MW~Magic Wand
Showing posts with label Designer: Alikas Scraps. Show all posts

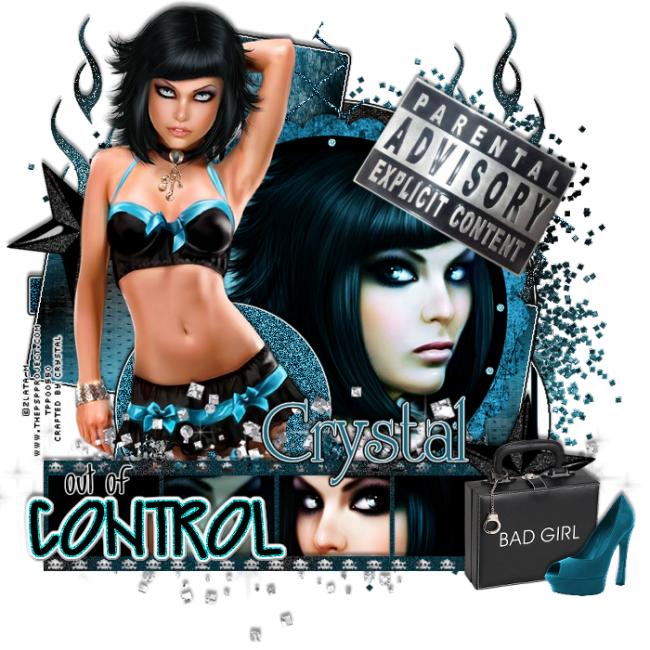
Out of Control


 This Tutorial was made by Chasunicorn

On March 14th, 2012.

*Updated on January 27, 2026*

Supplies:

Temp by Cakes

Tube(s) by Zlata M

Scrap Kit by Alikas Scraps

Filters:

Eye Candy~Grad Glow (Optional)

DSB Flux~ Bright Noise (optional)

Drop Shadow:

Your Preferred settings

Template:

*Layer 7...Select All/Float/Defloat...C&P Paper 11 into selection

*Layer 6...MW...Expand 2...C&P Paper 3 into selection

*Layer 5...Adjust/Manual color(Desired Shade)

*Layer 4...MW Both Circles...C&P Paper 2 into selection

*Layer 3...MW...C&P Paper 13 into selection

*Layer 2...MW...C&P Paper 12 into selection

*Layer 1...MW...Adjust/Manual Color (Desired Shade)/Add Desired ammount of noise

*Add Grad Glow to the template shapes for that pop out effect (Optional)

*Layer 2...Select/Float/Defloat/Contract by 4

C&P Close Up of your Tube...Invert Delete Deselect

Duplicate tube...Oringinal Luminace L/Opacity 66%

Copy Hard Light/Opacity 100%

C&P Elements:

*13...RS 85%...Slide under Layer 3...Duplicate/Mirror

*35...RS 85%...Slide to the bottom of all your layers

Place Full Body tube on the top of all your layers..RS if needed

*8...RS 75%...MW in each open frame part and fill with desired color(s)

I added the close up tubes eyes and used the Blend mode

you may use elements if you would like

*74...C&P above Layer 5

*2...RS 55%...Free Rotate 30%/Left...Slide above Layer 1...Duplicate/Mirror/Flip

Place Copy above Element 8

*60...RS 55%...Free Rotate 30%/Right...Place toward the top Right of your Tag

*83...RS 55% x2...Place in front of the Star at the bottom right corner

*86...RS 45% and then 75%...Mirror...Place in front of the briefcase

*24...RS 75% and then 90% x2 to fit over Layer 2

*79...RS 90% x2...Place above Main Tube image

*Place Template Wordart where you prefer

Add your name, Copyright info and Watermark

Re-Size your tag if you want to and you are done

Look Calm


This tutorial was written by Chasunicorn

On May 26, 2012.

*Updated November 2025*

Supplies:

Tube by Arthur Crowe's May Calendar Tube

Not seen him since his own store

Template: Dees' Sign Depot

Kit by Alikas Scraps

This Designer seems to have retired

Mask of Choice

I am using an Exclusive Mask for ACDivas by Artmama 

Filters:

Dsb Flux~Bright Noise/Add Noise

Photo Effex~Scanlines

Eye Candy 5: Texture Noise

Gradiant Glow

Drop Shadow:

-1/-3/42/6/Black

(adjust to fit your likes)

Template:

 (Remember to Deselect after each layer)

*Duplicate Template and close the original

*Raster 1....MW layer...C&P into selection paper 11...

appy your mask...Layers/New Mask/From Image...Merge Group

*Halftone...Select All/ Float/ Defloat...Fill with a color

from your tube or kit...Add Noise/dsb flux: Bright Noise (your own settings

that you like)

*Brown Oval...MW...C&P into selection paper 8

*Blue Rectangle...MW...C&P into selection paper 6

*Green Square...MW...C&P into selection paper 9

*Raster 2...Add Noise/dsb flux: Bright Noise (your own settings

that you like)

*Beige Circle...MW...Fill with a color from your tube or kit...

Photo Effex: Scanlines with these settings 3/5/25/17/100

*Brown Square Strips...MW...C&P into selection paper 7

*Small Blue Square...MW...C&P into selection paper 9...

Eye Candy 5: Texture Noise (your own settings that you like)...

Add a portion of your tube to this layer Select All/ Float/ Defloat/

Invert/Delete/ Deselect...Opacity 72%...Blend Mode Luminance (L)

*Raster 3...Delete

*Small Green Circle...MW...C&P into selection paper 10...

Penta: Color Dot Default Settings

**Add Gradiant Glow to all layers you have modified

except halftone, Beige Circle and Bullet Holes

C&P Elements:

 (Remember to add your own spin if you would like)

*Element 32...Place above Beige Circle and RS 95%

*Element 41...Place above Green Square

*Element 3...RS 75%x2...Move to the right...Mirror/Flip...

Merge Down...Place above the frame

*Element 2...RS 75%...Place above Small Green Circle...

Move towards the bottom of the canvas

*Element 9...RS 75%...Place to the left of the tag near the bottom

*Element 7...RS 85%...Place in front of the cupcake

*Element 10...RS 85%x3...Image/Free Rotate/30%/Right...

Place behind the cupcake

*Element 14...Place behind Lollipop

*Element 36...RS 85%x3 place in front of the other Cupcake

*Element 46...RS 85%x3 Place above Small Green Circle

*Element 62...Place above the layer bullet holes...Duplicate and Flip

Add your preferred Tube where you think it looks best

Duplicate...Gaussian Blur at 5...Blend mode Hard Light

Add your name, Copyright info and Watermark

Re-Size your tag if you want to and you are done


Super Bitch


This tutorial is done in PSP9 but am sure you can do it in other versions.

Created by Chasunicorn on February 18, 2012.

*Updated November 2025*

Supplies:

Tube w/Close up

Tube by Ismael Rac

I have not seen him selling since his own store.

Template made by Myself... I recently have Re-Vamped a few template to remove the wording...but I have the wording saved as Word art

Template HERE

Word Art:

Scrap kit by Alikas Scraps

This kit is unavailable but any kit would work

 Font used for the name is called Moonstone.

 Filters Used:

Xero-Fritillary

Eye Candy-Gradient Glow

Drop Shadow:

1/1/50/5/Black (adjust to your liking)

 Template:

**Duplicate Close Original

**Merge Raster 2 and Copy of Raster 2...Magic Wand/C&P Paper 8 into selection...Deselect

**Merge Raster 3 and Copy of Raster 3...Magic Wand/C&P Paper 12 into selection...Deselect

**Raster 4 Magic Wand/C&P Paper 3 into selection...Deselect

**Merge Raster 5 and Copy of Raser5 leave alone for now

**Raster 6...Magic Wand/Select Fill with a coordinating color from your kit or tube

Deselect...Add Xero: Fritillary with these settings 4/43/73/149

**Copy of Raster 6...Magic Wand/Select Fill in with another coordinating color from kit or Tube

Deselect...Add Xero: Fritillary with these settings 4/43/73/149

**Raster 7...Magic Wand/C&P Paper 1 into selection...Deselect

**Raster 8...Magic Wand/Select Fill with a coordinating color from your kit or tube

Add Xero: Fritillary with these settings 12/43/56/185...C&P Close up of your tube

Re-Size if needed...Select/Invert/Delete...Duplicate/Blend mode Luminance L/Opacity 72...

Copy of Close Up Blend Mode Multiply/Opacity 58...Deselect

**Raster 9 Super Bitch word art add a small gradient glow of your choice.

At this point after filling all the template shapes i go back and add my gradient glow to those layers

So they pop out on the finish project.

 C&P Elements:

(Use your imagination if my placement and elements are not to your taste.)

*96...RS 65%...Duplicate and place over the 2 small circles from Raster 5 (Keep or Delete Raster 5 Up to you)

*9...Slide under Raster 3

*1...Side under Raster 2 to the Top Left corner...Duplicate Mirror n Flip

*32...Slide under Raster 6

*26...RS 65%...Free Rotate/45% to the Left...Erase the enclosed Circle of the Ribbon...Place to the right

corner of Raster 8

*45...RS 75%...Free Rotate/45% to the right...Place in adjacent corner of the Ribbon

*18 & 19...RS 85% x2 on Ele. 19 and 85% on 18 once...Place toward the bottom the Tag

*91...RS 75% and then 85%...Place at the end of the ribbon at the bottom of the tag

Add your preferred Tube where you think it looks best

Add some Gradient Glow to the Main Word Art...Re-Arrange to best suit your needs.

Add your name, Copyright info and Watermark

Re-Size your tag if you want to and you are done.