Welcome to Crazed Creations by Crystal Tutorials!
I have been hunting down all of my tutorials for a few years now,
and finally I was able to locate them just the other day.
Some things to know about these tutorials... 
Most of them are missing links to supplies, whether it is 
because an artist or designer has retired, tagger's blog has 
been deleted etc. In this case, please treat the tutorial
as inspiration. As I update each tutorial, I will slowly re-release them.
ALL Tutorials before 2024 are AI FREE, meaning no AI was used.
and all newer tutorials will be labelled accordingly.

Any and all Tutorials posted within this site
are of my own creation.
Any similarities to any other is purely coincidental.
 DO NOT CLAIM AS YOUR OWN!
You are allowed to use them as challenges within your forum 
by linking back to this site.
I hope you enjoy the tutorials that I have created.
Please feel free to leave comments and or suggestions!!!
Some tips...
I use abbreviations in my tutorials, 
the more common ones are below:
C&P~Copy and Paste
RS~Re-size
DS~Drop Shadow
MW~Magic Wand
Showing posts with label Artist: PinUp Toons. Show all posts

Autumn In The Park

 
This Tutorial was written by Chasunicorn
on September 8, 2013.
*Updated on May 22, 2026*
Supplies:
Tube by Pin Up Toons 
Autumn Sunset Scrap Kit by BitsnBobs
Template 66 by Spawn
Filters:
NONE
Drop Shadow:
Whatever you prefer
Template:
**Open template and Duplicate
Close original and delete Credit layer
**Close out all layers except the background layer
(I tend to work from the bottom to the top)
**Delete the Left and Right Black Line Layers
*Main Background Layer...MW and C&P into selection paper 13
*Right & Left Foreground Layer...Merge down these layers
MW...Flood Fill with a color that matches your tube or Kit...
I am using #9d3e61 that i found in the paper in the background
*Close Up Tube...C&P as a new layer a close up of your tube...
Invert/Delete...Duplicate/Mirror...On each copy of your tube change
the Blend Mode to Hard Light or Multiply
*Middle Foreground Layer...MW...Flood Fill with a color
that matches your tube or Kit...
I am using #696548 that I found in the paper in the
background...Opacity 50%
*White Dots Layer...Change the Blend Mode to Soft Light
*Right & Left Square Lines Layer...Select All/ Float/Defloat
Flood Fill with a color that matches your tube or Kit...
I am using #f76651...Change Blend Mode to Soft Light
**Create a small border with any color that matches your kit or tube
C&P Elements:
*Element 40...C&P as a new layer...RS 65%...Place along the Square Lines layer...
Duplicate/Mirror
*Element 60...C&P as a new layer...RS 65%...Place above the White dots layer
Opacity 50%
*Element 17...C&P as a new layer...RS 65%...Place in a top corner
Duplicate/Mirror...Merge down
Add your preferred Tube where you think it looks best
Add your name, Copyright info and Watermark
Re-Size your tag if you want to and you are done

Asian Style


This tutorial was written by Chasunicorn

on March 24th, 2013.

*Updated on May 22, 2026*

Supplies:

Tube by PinUp Toons

Asian Grace Scrap Kit by Abstract Creations

Mask of choice

Filters:

None

Drop Shadow:

Whatever you prefer

Canvas Size:

700x700

C&P Elements:

*C&P paper 1 as a new layer and apply your mask of choice

Merge group

*C&P Frame 2...MW inside the frame and a new layer

and C&P paper 3 into selection

*Add a close up as a new layer...Invert/Delete

*C&P Element 17 as a new layer...Mirror and RS 55%

and rotate slightly...Duplicate and rotate again slightly

Place on the right side around the frame.

*C&P Element 25 behind the flowers

*C&P Element 24...place behind the copy of the flowers

*C&P Element 28, 29, & 30 RS to your liking and arrange on the right side

of the frame

*C&P Element 22 and place in between the sushi elements

*C&P Element 8 and place in front of the sushi elements

RS by 75% about 3 times

Add your preferred Tube where you think it looks best

Add your name, Copyright info and Watermark

Re-Size your tag if you want to and you are done 

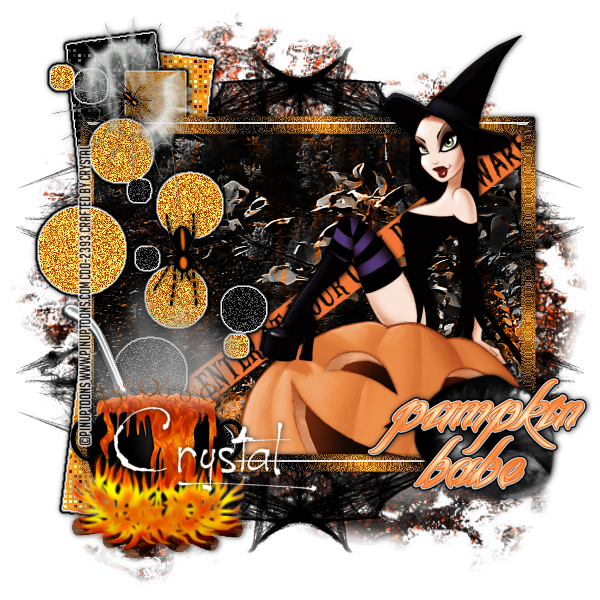
Pumpkin Babe


This tutorial was written by Chasunicorn

On September 19, 2012

*Updated on January 27, 2026*

Supplies:

Tube by PinUpToons

Jessica Dougherty 19-1 Scrap Kit by Abstract Creations

Template by MelissaV HERE

Mask of Choice

Filters:

Xero- Fritillary

DSB Flux-Bright

Eye Candy: Impact- Glass

Eye Candy: Impact- Gradient Glow

Drop Shadow:

Whatever you prefer

Template:

*Open the template Duplicate and close the original

Delete the credits layer on the Copy.

*Background...MW...C&P paper 4 into selection apply a mask of Choice

Merge Group

*Strip 3...MW...Flood Fill with black...Apply Xero- Fritillary

Settings 5/55/75/165

*Strip 2...MW...Flood fill with an Orange that matches your tube or Kit

Apply Xero- Fritillary Settings 5/55/75/165...Slide layer below Strip 3

*Strip 1...MW...Change you color palette to a Fore/Background gradient

Settings Linear/Angle: 45/Repeats: 1...Flood Fill...Apply a Soft Noise with

DSB Flux-Bright Noise 30%

*Center Rectangle...MW...C&P Paper 2 into selection

*Frame...MW...Flood fill with Gradient change the repeats to 10...Add Soft Noise

with DSB Flux same settings as Strip 1

Lets add a bit of shine to the frame by adding a glass effect with

Eye Candy: Impact- Glass...Use any setting you like.

*Circles...We are going to color every other circle black...and then the others will be

Colored Orange...Add a Lot of noise with DSB Flux-Bright noise 95%

**Optional...Add a 2 tone Gradient Glow to Strips and Circle Layers

C&P Elements:

**Add your preferred Tube where you think it looks best

Click on the frame layer...MW inside the frame...Selections/Modify/Expand 3

Select your Tube layer and Duplicate...Slide one copy of it below the frame...

Selections/Invert Delete...Click on the top tube layer and delete any part of

the tube that is hanging below the frame.

*Element 2...RS 65%...Mirror and place in front of the Circles

*Element 9...RS 65%...Place in the top left corner of the frame

Duplicate and Mirror...Merge Down...Duplicate the Merged Layers and Flip

Again Merge Down and slide the web down to be placed on top of the Mask

*Element 11...Place above the Center Rectangle...Arrange so that none of the

Element shows pass the frame

*Element 1...RS 65% 2 times...Place in the top left corner

(See my tag for reference)

*Word Art 1...Add a gradient glow (Optional)...Place on your tag where you like

Add your name, Copyright info and Watermark

Re-Size your tag if you want to and you are done


Happy Halloween


This tutorial was written by Chasunicorn
On September 15, 2012.
*Updated November 2025*
Supplies:
Tube by PinUp Toons
Not seen since SDNC
Kit by Abstract Creations
This Designer has Retired
Template by Me HERE
Mask Of Choice
Filters:
Eye Candy: Gradient Glow
Drop Shadow:
Whatever you prefer
Template:
**Delete Credit layer
*Raster 1...MW C&P paper 2 into selection and apply mask...
Merge group.
*Black Rectangle...MW...C&P paper 1 into selection
*White Rectangle...MW...C&P paper 3 as a new layer Invert/Delete
Merge down
*Merge Right and Left Grey Rectangle layers...MW both rectangles and
C&P paper 4 as a new layer...RS by 85%... Invert/Delete...Merge down
**Add some Grad Glow to all layers
C&P Elements:
*Element 11...C&P above Black Rectangle...move to the left slightly
*Element 9...C&P as the top layer...move slightly to the top of the
canvas...align with the top left corner of the Black Rectangle.
*Element 14...RS 55% x2...Image/Free Rotate 30% to the left...place on the web.
*Element 8...RS 75%...Erase the handle...slide to the bottom right corner of the canvas
*Element 4...RS 55% x2...Place in from of the caldron
*Element 5...RS 55% x3...Mirror and then Place by the pumpkin
*Element 12...RS 75% x2...Image/Free Rotate 30% to the right
place in the top right corner of the canvas
**Chose your White Rectangle layer...Select all/Float/De float...
Select/Modify/Contract by 2...Add your tube...Erase any part of the tube that
goes pass the white Rectangle
Duplicate your tube...slide one copy under the left and right rectangles
On the top copy erase any part of the tube that hangs over the top rectangles on the right.
If your web goes through your tube layers just delete some of the web that peeks through.
*Element 15...C&P and RS 75% place it where you like
Add your name, Copyright info and Watermark
Re-Size your tag if you want to and you are done

First Day


This Tutorial was written by Chasunicorn
on September 1, 2014.
*Updated November 2025*
Supplies:
Tube by Pin Up Toons
Not seen him selling since SDNC
School Memories Scrap Kit by Jens Sweet Temptations HERE
Back to School Template 1 by Jens Sweet Temptations HERE
Filters:
NONE
Drop Shadow:
Whatever you prefer
Template:
**Open template and Duplicate
Close original and delete Credit layer
**Close out all layers except the background layer
(I tend to work from the bottom to the top)
*Raster 1 layer...MW and C&P into selection paper 7
Apply Mask of Choice and Merge Group
*Copy of Raster 2 & Raster 2 layers...Merge these layers...
MW and C&P into selection paper 4
*Raster 3 layer...MW and C&P into selection paper 2
*Raster 4 layer...Select All/Float/Defloat and flood fill with white
Apply some noise
*Copy of Raster 5 & Raster 5 layers...Merge these layers...
MW and C&P into selection paper 8
*Raster 6 layer...MW and C&P into selection paper 1
*Copy of Raster 7 layer...MW and C&P into selection paper 5
*Raster 7 layer...Select All/Float/Defloat and flood fill with white
Apply some noise
*Copy of Raster 9 & Raster 9 layers...Merge These layers...
MW and C&P into selection paper 2
*Copy of Raster 8 & Raster 8 layers...Merge these layers...Select All/Float/Defloat
and Flood Fill with #32201c
*Raster 10 layer...Select All/Float/Defloat
and Flood Fill with #520016
*Raster 12 layer...MW and C&P into selection paper 2
*Raster 11 layer...Select All/Float/Defloat and flood fill with white
Apply some noise
C&P Elements: 
*Lockers 1-3...C&P as new layers...Stagger the lockers and Merge them together
Duplicate the lockers...Arrange among the template layers to your liking
*Frame 2...C&P as a new layer...Place to the lower left corner
Duplicate/Mirror/Flip...Merge Down
*Books...C&P as a new layer...RS by 55%...Place to the bottom of the template
slightly to the left side
*Binders 1 & 2...C&P as new layers...RS by 55% 
Place behind the books
*Book...C&P as a new layer...RS by 45%...Place in front 
of the books and binders
*Book Bag...C&P as a new layer...RS by 45%
Place to the bottom right of the canvas
*Pen 1...C&P as a new layer...RS by 45% and place 
in front of the book bag
Add your preferred Tube where you think it looks best
Add your name, Copyright info and Watermark
Re-Size your tag if you want to and you are done

Winter Walk


This tutorial was written by Chasunicorn
on December 27, 2012.
*Updated November 2025*
Supplies:
Tube by PinUp Toons
He has not been in a store since SDNC
Template by Denny HERE
Scrap Kit by A Space Between
This kit is unavailable but any Winter kit should work
Filters:
None
Drop Shadow:
Whatever you prefer
Template:
(I work from bottom to top of the template)
*Raster 1...MW...C&P into selection paper 8
Apply a Mask of Choice
*Dotted Line...Select all/Float/De-float
Flood Fill with the color #91583b add some noise
*Patterned Back...Select all/Float/De-float
Flood fill with White
*Rectangle...MW...C&P into selection paper 10
*Strip...MW...C&P as a new layer paper 14
RS 55% 2x's and again by 75%...chose what part of the paper you like
Invert/Delete...Merge Down
*Shape...C&P into selection paper 9
*Frame Backs...Select/Modify/Expand 1...C&P into selection paper 5
*Frames...Select/Modify/Expand 2...C&P into selection paper 11
MW inside the frames...1st frame...Duplicate/Original Blend Mode
(Luminance L)/Copy Blend Mode (Overlay)...Drop Opacity to 75%
2nd & 3rd frame...Repeat steps for the 1st frame
but play with the Blend modes
C&P Elements:
*Element 34...RS 55% 4x's and again 85%...
Place above the shape layer
*Element 54...RS 45% 2x's and again 75%
Weave the element above and below the frames
(Best way to do this is place a copy of the element
on top of the frames and one on the bottom underneath the
Frame backs...the copy on top of the frames would be the one
you would erase parts of to create the weave.)
*Element 14...RS 25% and again 75%...Place above the
Patterned Back and slide towards the top right corner
*Element 27...RS 25% and again 65% 2x's
*Element 2...RS to suit your taste...Place multiples in various
places and sizes
*Element 16...RS 25%, 45% and again 75%...Place in front of
the wagon wheel
*Element 18...RS 25% 4x's or until the size is preferred
Weave the element like you did with the leaves.
Add any other elements you like
Add your preferred Tube where you think it looks best
Add your name, Copyright info and Watermark
Re-Size your tag if you want to and you are done