
This tutorial was written by Chasunicorn
on February 25, 2013.
*Updated November 2025*
Supplies:
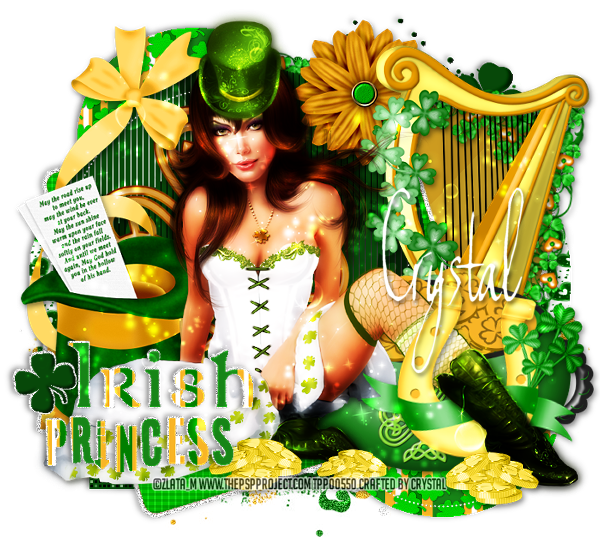
Tube by Zlata_M
Supplies:
Tube by Zlata_M
You can find her tubes HERE
Scrap Kit by Kittz Kreationz
This kit is unavailable but any St. Patricks Kit should work
Template #6 by Kandi and Dee
Mask #2 by Dees' Designs
Filters:
Xero~ Fritillary
Vm Extravaganza~ Ray Transmission
PhotoEffex~ Scanlines
Birgits Chaos~ Dreamcatcher
Tramages~ Tow the Line
MuRa's Meister~ Copies
Drop Shadow:
Whatever you prefer
Template:
**Open and Duplicate...Close Original
Delete credits...Close out all of the layers
except the Background
(I tend to work from the bottom to
the top of any template tag)
*Background...MW layer...C&P paper 3 into selection
Apply mask...Merge Group...Add some noise
*Splatter...Select all/Float/De-float...Flood Fill
with a dark green (#074809).
Keep Selected and add a new raster...Effects/Cut Out
with these settings Vertical:-3, Horizontal:-4...Opacity:65
Blur: 5
*Green Bar...MW and Flood fill with a Dark Green
(#074809)....Apply Xero~Fritillary with these settings
5/15/100/150
*Orange Circle...MW and C&P paper 2 into selection
*Small Dotted Circle...Add some noise
*Yellow Circle...MW and C&P paper 2 into selection
*Green Oval...MW and C&P paper 1 into selection
*Yellow Square...MW and Flood fill with a Golden Yellow
(#f8b526)...Keep selected and add a new raster...Apply
Vm Extravaganza~ Ray Transmission...Default settings
*Frame 3...Add some noise
*Orange Square...MW and Flood fill with a Bright Green
(#00cc00)...Apply PhotoEffex~ Scanlines 2xs on the second application click
the vertical toggle
*Frame 2...Add some noise
*Yellow Strip...MW and Flood fill with a Golden Yellow
(#f8b526)...Keep selected and Duplicate...Apply
Birgits Chaos~ Dreamcatcher...Default settings...Blend Mode Overlay
and Opacity 35%
*Frame 1...Add some noise
*Green Circle...MW and Flood fill with a Dark Green
(#074809)...Apply Tramages~ Tow the Line Default Settings
*Large Dotted Circle...Add some noise
*Heart Crown...Place on top of the Green Circle
Apply MuRa's Meister~ Copies using the Wallpaper (Rotate) Setting
Adjust the number of copies to you liking...Highlight the Circle layer
Select All/Float/Defloat...Invert/Delete...highlight the heart crown layer...
Blend Mode Overlay and Opacity 55%
*Word Art Back...Add more Noise
*Word Art...Re-color to you liking
**Add you tube where you like it
C&P Elements:
*LM-2...C&P as a new layer...place above the large dotted circle
*LM-62...C&P as a new layer...RS 86% 3xs...Mirror/Flip...
Rotate to the right 10%...Place above Frame 3
*LM-40...C&P as a new layer...RS 85% 2xs...Rotate to the left 10%
Mirror and place behind the tube...Duplicate and place one on top of the tube
Delete any of the leg so it looks like the horse show is wrapped around.
*LM-68...C&P as a new layer...RS 86% and place behind your tube
*LM-57...C&P as a new layer...Place behind your tube to the right of the
canvas.
*LM-37...C&P as a new layer...Place in front of the harp.
*LM-7...C&P as a new layer move to the left of the canvas behind your tube...
RS 85% 2xs
*LM-44...C&P as a new layer...Duplicate a few times and arrange
near the bottom of your tube...RS to your liking.
**Add any other elements you would like
Add your name, Copyright info and Watermark
Re-Size your tag if you want to and you are done
No comments:
Post a Comment